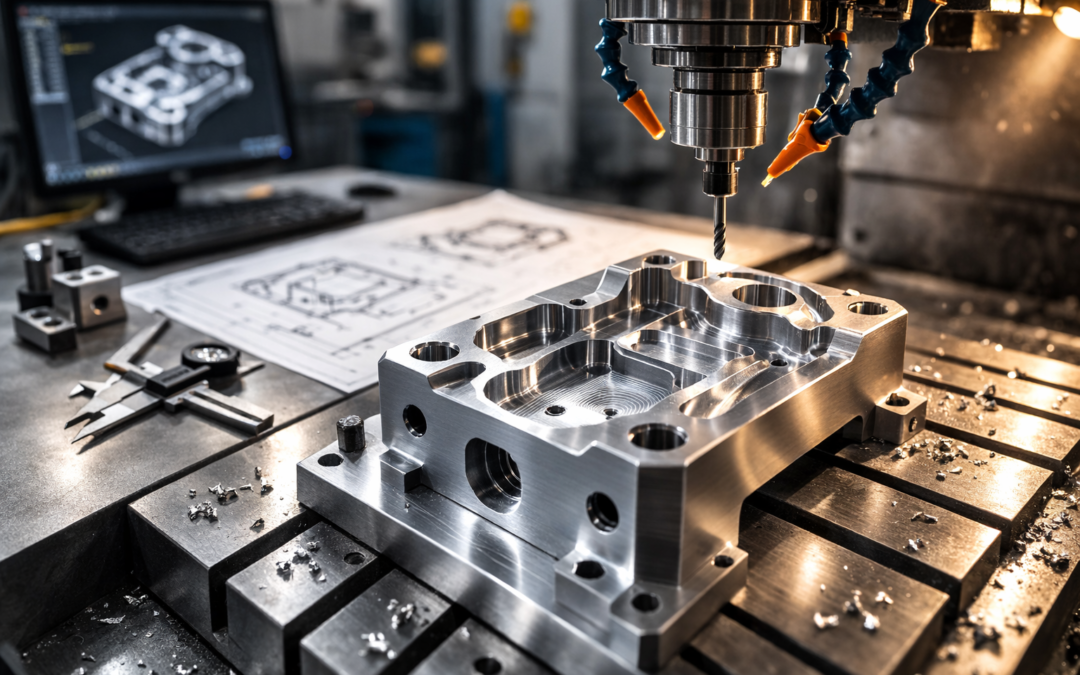
Prototype CNC machining is one of the most reliable ways to turn a design concept into a physical part you can measure, test, and improve. Whether you’re validating fit and function, proving out a manufacturing route, or building a small pre-production batch, CNC machining gives you real-world results without the long lead times of tooling-heavy processes.
Unlike “looks-like” prototypes, CNC prototypes can be made from the same materials you’ll use in production – aluminium, stainless steel, engineering plastics, and more – so your testing reflects reality. That’s why prototype CNC machining is widely used across aerospace, automotive, medical, energy, and industrial sectors: it bridges the gap between CAD and confident decision-making.
This guide covers how prototype CNC machining works, how to design parts that machine well, how to choose materials, what tolerances and finishes to consider, and how to avoid common prototyping pitfalls. The goal is simple: help you get better prototypes, faster, and without surprises.
What Is Prototype CNC Machining and When Should You Use It?
Prototype CNC machining is the use of CNC mills, lathes, and related processes to create early-stage parts for testing or evaluation. Prototypes might be one-off components, short runs of a few pieces, or iterative versions as your design evolves. A major benefit is that CNC machining doesn’t require dedicated tooling like injection moulding does. You can go from a CAD model to a machined prototype quickly, making it ideal when you need to learn fast and change direction without heavy sunk costs. Prototype CNC machining is particularly useful when:
- Your part needs to be made from production-grade material for accurate testing
- You require tight tolerances or high dimensional stability
- You need a functional assembly test (interfaces, clearances, fasteners)
- You’re preparing for certification, qualification, or customer approval
- You expect multiple iterations and want a repeatable process
Because CNC machining is controlled and measurable, it’s also a great method for documenting what changed between iterations – critical when you’re moving toward a frozen design.
Prototype CNC Machining vs 3D Printing and Other Prototype Methods
Prototype CNC machining isn’t the only route, so it helps to understand where it excels compared to alternatives like 3D printing, casting, or hand fabrication. The best method used by component manfacturers depends on what you’re trying to prove. When you need accurate geometry, reliable tolerances, and real material performance, CNC prototypes often outperform other options. If your priority is speed at any cost, additive methods can be quicker for early “shape checks,” but they may not behave like production parts under load, temperature, or wear. Key differences to consider:
- Material realism: CNC can match production alloys and plastics more easily than many print processes.
- Mechanical performance: Machined parts typically have predictable strength and stability, especially compared with layered prints.
- Surface finish: CNC can achieve smoother functional surfaces without post-processing.
- Tolerance control: CNC is usually better for precision interfaces, bores, threads, and sealing features.
- Geometry freedom: 3D printing wins for internal channels and complex lattices, but those shapes may be difficult or impossible to machine.
A common workflow is using printing for early design exploration, then switching to prototype CNC machining once you’re validating function and manufacturability.
CNC Prototyping Process Step-by-Step
A structured approach to prototype CNC machining reduces cost, lead time, and rework. Even when parts are urgent, a few checks early on can save days later. Typical CNC prototyping steps include:
- Review of CAD and requirements (tolerances, datums, critical features)
- Material selection based on function and availability
- Process planning (milling vs turning, 3-axis vs 5-axis, setups)
- Toolpath programming and verification
- Machining and in-process checks
- Deburr, clean, and finish as required
- Final inspection (dimensional checks, CMM if needed)
- Feedback loop to update the next iteration
In practice, the biggest time-savers come from good upfront definition: clear drawings, sensible tolerances, and a shortlist of “must-hit” features vs “nice-to-have” ones for early prototypes.
Design for Prototype CNC Machining: DFM Basics That Save Time and Money
Design for manufacturability (DFM) matters even more in prototyping, because you’re often paying for flexibility and speed. Simple design choices can reduce setups, shorten machining cycles, and improve repeatability across iterations. Before any bullets, here’s the core principle: prototype CNC machining rewards clarity. If a feature doesn’t need to be precise yet, don’t specify it as such. If a surface isn’t functional, don’t demand a cosmetic finish. Let the prototype answer the questions that actually matter. Common DFM wins for CNC prototypes:
- Avoid ultra-thin walls unless absolutely necessary (they chatter and distort)
- Use standard hole sizes where possible (drills/reamers are faster than interpolation)
- Add generous internal radii (small internal corners require small tools and time)
- Minimise deep, narrow pockets (they increase tool deflection and cycle time)
- Keep tolerances realistic and only tight where function demands it
- Define datums clearly so inspection and assembly are repeatable
- Plan for workholding (flat faces and accessible clamp areas reduce setups)
A good rule of thumb: design your first CNC prototype to learn fast, then tighten and refine on the next iteration once you know what truly needs control.
Tolerances in Prototype CNC Machining: What to Specify and Why
Tolerances are one of the biggest drivers of cost and lead time in prototype CNC machining. Tight tolerances increase machining time, inspection effort, and scrap risk, especially when designs are changing quickly. Instead of applying blanket tolerances everywhere in an attempt to control CNC machining costs, assign them based on function. A prototype should test critical interfaces and performance features first. Non-critical geometry can often be looser until the design stabilises. Guidance for tolerancing CNC prototypes:
- Use tight tolerances only on functional interfaces (bearing bores, sealing faces, alignment features)
- Apply general tolerances for non-critical dimensions
- Call out geometric tolerances (GD&T) where form and alignment matter more than size alone
- Be explicit about threads and fits (e.g., H7 bores, press fits, sliding fits)
- Consider measurement method (if you need CMM verification, include the requirement early)
If you’re unsure, a quick conversation with a machinist or manufacturing engineer can often identify which features are “prototype-critical” and which can be relaxed for speed.
Material Selection for CNC Prototypes: Metals and Plastics
One of the strengths of prototype CNC machining is material choice. You can validate how a design behaves in realistic conditions – thermal expansion, stiffness, corrosion resistance, wear, weight, and machinability. Material selection for prototypes should balance:
- what you need to learn, and
- what you can source quickly and machine efficiently.
Common materials for prototype CNC machining:
- Aluminium alloys for lightweight parts and fast iteration
- Stainless steels for corrosion resistance and strength
- Mild steels for cost-effective functional testing
- Titanium for high performance and weight-critical applications
- Engineering plastics like acetal (POM), nylon, and PEEK for insulating, lightweight, or chemical-resistant machined plastic parts
Material choices that often speed up early iterations:
- Pick a readily available grade close to your end material
- Use “machinable” plastics and stable metals to reduce warping
- Avoid exotic grades until you’ve proven the design fundamentals
At Tarvin Precision, prototype work often benefits from a pragmatic approach: use a material that reflects the end application where it matters, but don’t overcomplicate early versions when you’re still learning what to change.
Surface Finish and Prototype CNC Machining: Functional vs Cosmetic Requirements
Surface finish can be critical, or completely irrelevant, depending on what the prototype is testing. Prototype CNC machining can produce everything from standard machined finishes to fine, functional surfaces suitable for sealing or sliding contact.
Specify finish based on function, not appearance. Cosmetic requirements can add time and cost quickly, especially when combined with tight tolerances. Surface finish considerations for CNC prototypes:
- Sealing faces may require finer finishes to prevent leaks
- Bearing or sliding surfaces may need controlled roughness for wear performance
- Adhesive bonding areas sometimes benefit from a defined texture
- Cosmetic surfaces might need uniform toolpaths or secondary finishing
- Deburring requirements should be clear if parts are handled frequently or assembled tightly
Also consider edge treatment. A small chamfer or radius can improve safety, assembly, and part robustness, especially on prototypes that get handled a lot during testing.
Rapid Prototype CNC Machining: How to Reduce Lead Time Without Compromising Quality
“Rapid” prototype CNC machining isn’t just about machining faster. It’s about removing uncertainty: clear requirements, sensible tolerances, and designs that don’t create unnecessary complexity. If you need parts quickly, focus on the factors that slow prototyping down – revisions, ambiguity, and difficult features that require extra setups or special tooling. Ways to speed up CNC prototyping:
- Send a complete data pack (CAD + drawing + revision notes)
- Mark critical features clearly (and relax the rest)
- Use standard materials with good availability
- Limit the number of operations (reduce multi-face machining if possible)
- Prefer accessible features (avoid deep pockets and tiny internal corners)
- Agree inspection expectations upfront (what needs recording, what doesn’t)
- Batch iterative changes so each prototype revision delivers meaningful learning
A fast prototype that doesn’t answer the right questions is slow in the long run. Aim for prototypes that are “fit for learning,” not perfect replicas of the final part.
Prototype CNC Milling: When 3-Axis Is Enough and When You Need 5-Axis
Prototype CNC machining includes both milling and turning, but milling is often the go-to for complex prismatic shapes, housings, brackets, and multi-feature components. The decision between 3-axis and 5-axis machining affects cost, speed, and achievable geometry. Many prototypes can be produced efficiently on 3-axis machines with multiple setups. 5-axis machining can reduce setups and improve access, especially for angled features or complex surfaces.
When 3-axis milling is a good fit:
- Features are mostly on a few orthogonal faces
- Multiple setups are acceptable
- Geometry doesn’t require constant tool orientation changes
When 5-axis milling helps prototypes:
- Complex surfaces or blended forms need consistent tool contact
- Angled holes and features must be precise
- You want fewer setups for speed and accuracy
- Workholding would be difficult with 3-axis approaches
Choosing the right approach early can prevent redesigns later, especially if you’ll scale the same route into low-volume production.
Prototype CNC Turning and Mill-Turn: Faster Routes for Cylindrical Parts
Not all prototype CNC machining is milling. If your part is cylindrical – shafts, bushings, spacers, threaded components – CNC turning is often faster and more cost-effective. Turning produces excellent concentricity and surface finish on round features, and modern lathes can combine operations like drilling, boring, threading, and even milling flats or cross-holes using live tooling. Common turning advantages in CNC prototyping:
- Fast cycle times for rotational geometry
- Consistent concentricity for fits and bearing surfaces
- Efficient thread production (internal and external)
- Mill-turn capability for complex features in one setup
If your prototype has both prismatic and cylindrical features, a mill-turn route might reduce setups dramatically, improving repeatability across iterations.
Inspection and Quality Control for CNC Prototypes
Even at prototype stage, measurement matters. The goal isn’t to create paperwork, it’s to ensure the prototype is a trustworthy representation of the design, especially where fit, function, and safety are concerned. Here’s the practical takeaway: inspection should match intent. If you’re testing airflow, sealing, structural response, or assembly alignment, you need confidence in the dimensions that affect those outcomes. Good inspection practices for prototype CNC machining: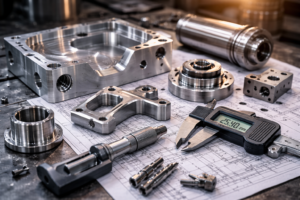
- Define critical dimensions (CTQs) and inspect them consistently
- Use datums that match assembly reality
- Record measurements for features that drive design decisions
- Check geometric relationships like position, flatness, and parallelism where needed
- Plan for repeatability if you’ll run multiple prototype iterations
Tarvin Precision’s day-to-day work often involves balancing speed with controlled process steps—especially when prototype parts are part of a wider qualification journey. A prototype that’s measured properly is easier to iterate with confidence.
Common Mistakes in Prototype CNC Machining and How to Avoid Them
Most prototype issues don’t come from machining, they come from unclear intent, unrealistic tolerances, or missing details. The prototype stage is where learning should happen, but you can avoid needless delays with a few checks. Remember, prototypes are experiments. The mistake is treating every dimension as final, or changing too many variables at once so you can’t tell what caused improvement or failure. Mistakes to watch for in CNC prototyping:
- Over-tolerancing everything “just in case”
- Ignoring tool access (deep features, tiny internal corners)
- Missing or unclear datums that make inspection ambiguous
- No revision control (confusing “latest” files and drawings)
- Choosing difficult materials too early without proof of design stability
- Not specifying edge break/deburr requirements
- Changing multiple design variables at once, making results hard to interpret
A disciplined iteration plan – change one thing, measure the effect, repeat – can cut overall development time dramatically.
Prototype CNC Machining for Low-Volume Production
One of the reasons prototype CNC machining is so valuable is that it scales naturally into low-volume production. Once you’ve proven the design, the same CNC route can often produce small batches without the need for expensive tooling. This is ideal for:
- bridge production while tooling is being made
- spares and legacy parts
- bespoke or configurable products
- specialist assemblies with frequent design updates
Low-volume CNC production also keeps flexibility high. You can implement engineering changes quickly and maintain control over quality, materials, and traceability.
If you’re in an industry with demanding requirements, it can be helpful to work with a supplier that treats prototypes with production discipline. Tarvin Precision, for example, supports prototype and development work while maintaining robust process control, without turning the relationship into a hard sell.
Preparing Your RFQ for Prototype CNC Machining
A clear RFQ reduces back-and-forth and helps you get a prototype that matches your intent. It also makes it easier for a machining partner to suggest improvements that reduce cost and lead time. Focus on clarity: what does “success” look like for this prototype? If you can answer that, the rest follows. Include this in your CNC prototype RFQ:
- 3D CAD model (STEP preferred) plus 2D drawing if available
- Material and temper/condition (or acceptable alternatives)
- Quantity and iteration expectations (one-off vs short run)
- Critical features (highlight tolerances and functional surfaces)
- Surface finish requirements where they matter
- Threads, inserts, and hardware details
- Inspection requirements (what needs reporting)
- Target date and any testing milestones
- Notes on intended use (fit check, load test, thermal, sealing, etc.)
The more you can share about the prototype’s purpose, the more likely you’ll get practical suggestions that improve outcomes.
FAQ: Prototype CNC Machining
How fast can prototype CNC machining be?
Lead time depends on complexity, material availability, and inspection requirements. Simple parts in common materials can move quickly; complex multi-setup parts or exotic materials take longer.
Is prototype CNC machining expensive compared to 3D printing?
For very early “form-only” prototypes, printing can be cheaper. But for functional parts requiring real materials, tighter tolerances, or better surface finishes, CNC machining often provides better value because it produces more reliable test results.
Can I prototype in the same material as production?
Often yes, and that’s a key advantage. If production material is hard to source quickly, a close substitute can be used for early iterations, just be clear about what you’re testing.
What file formats should I send?
STEP files are widely accepted for machining. Include 2D drawings for tolerances, datums, thread specs, and notes that a 3D model alone may not capture.
Do I need GD&T for prototypes?
Not always, but it can be helpful when relationships between features matter more than individual sizes. If your prototype is an assembly or needs alignment, GD&T can reduce ambiguity.
Prototyping Parts The Right Way
Prototype CNC machining is about learning quickly with parts you can trust. When you design with machining in mind, specify tolerances that match real functional needs, choose materials strategically, and clarify what the prototype must prove, you’ll get faster iterations and better decisions. If you want prototypes that transition smoothly into low-volume production, treat each iteration as a step toward manufacturability – not just a one-off build. That’s where CNC prototyping shines: repeatable processes, measurable results, and the ability to refine designs methodically. And if you’re working with a UK machining partner like Tarvin Precision, the benefit is often in the approach as much as the machines – clear communication, controlled processes, and prototype builds that respect the realities of production, without turning every interaction into a sales pitch.